I’ve posted this photo before, but I thought it would be interesting to go through the photo’s evolution. It’s sometimes the little things that can make a big difference in the finished image.
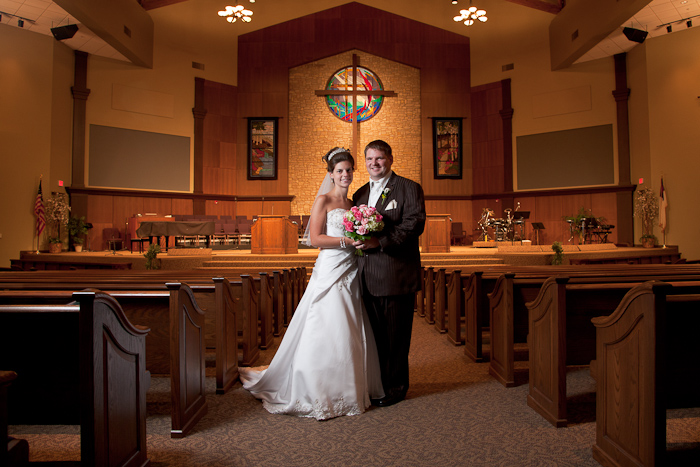
The first photo below is the starting point. The composition places the couple near the back of the sanctuary so that a wide angle lens takes in the entire setting. That also creates a number of leading lines that all converge to the center, so the bride and groom are easily the center of attention.
The main light on the bride and groom is coming from camera left where my assistant is holding a strobe shooting through an umbrella. That creates the direction of light on the couple so that they have depth and dimension. It also causes the colors of the dress and the flowers to be rendered naturally. Again, the colors lead your eyes right to the couple. The gold colors of the background are from the tungsten lights in the church. Since I was using a relatively high ISO and slow shutter speed (ISO 800, 1/20th of a second at f/5.6) the background is under exposed a little bit, again so that the couple stand out.

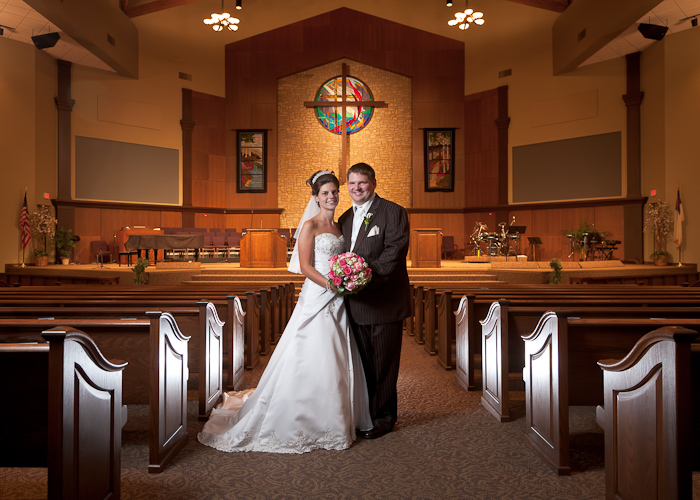
It’s a good starting point, but the next step was to add a second strobe behind the couple (see the photo below). It’s the same basic picture, but the addition of the backlight creates a glow around the couple, and especially, it adds reflections to the ends of the pews. Now, the two lines of pews create another strong graphical element that helps lead your eyes right to the bride and groom.

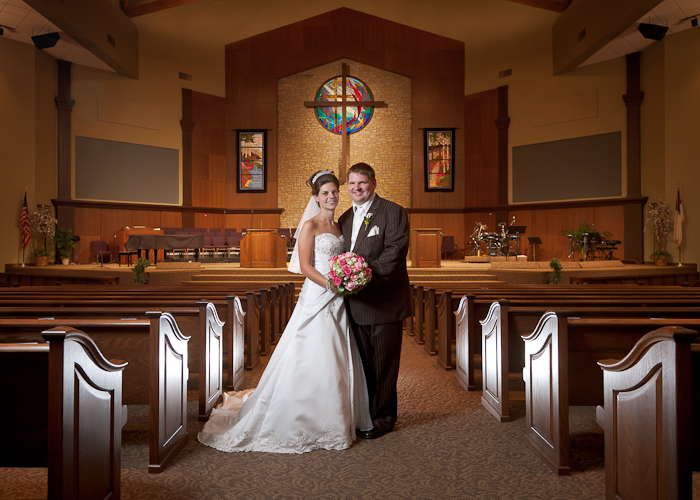
But, there are a few distractions in the photo, and I feel like the background is too gold, so it’s Photoshop’s turn. No real dramatic changes. I adjusted the color of the background separately from the foreground. I didn’t completely neutralize the warm tones, but it’s about half way to being neutral. I also removed the two light fixtures at the top of the frame, and the two exit signs on either side. That last big change in Photoshop was to brighten the two hanging tapestries on either side of the cross.

