Installing Geothermal Heating and Cooling

My son, Chris, just bought a house. Like most people, there were a few things he wanted to do to “fix it up” before moving in. The bad news – the furnace and air conditioner in his new house were well past their prime and both needed to be replaced. The good news – he installs geothermal heating and cooling systems for a living. His part of the process is drilling the “well” where he then installs the loop of pipe that transfers the heat between the house heating system and the ground.

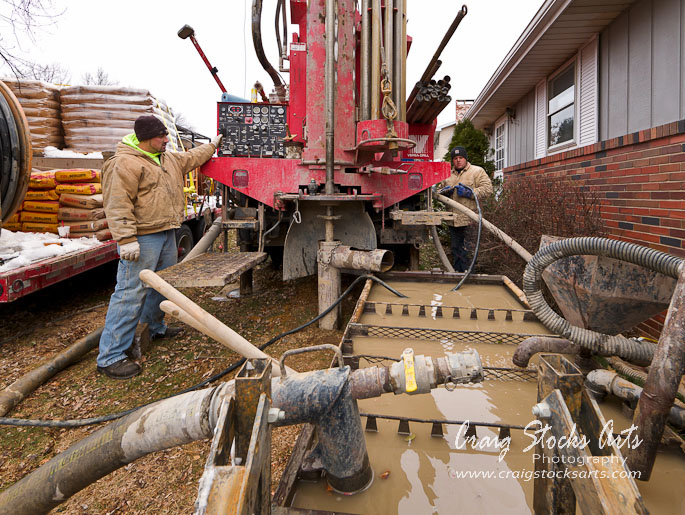
As a father, this gave me an opportunity to see my son doing his job. As an engineer, it was interesting to see how the process all comes together. And, as a photographer, it was a great opportunity to document the process. The photo below shows Chris (on the right) and his assistant Norman as they’re just about ready to start drilling the first of three holes. Their plan was to drill three holes, each 300 feet deep.

Ready to start drilling for geothermal heating

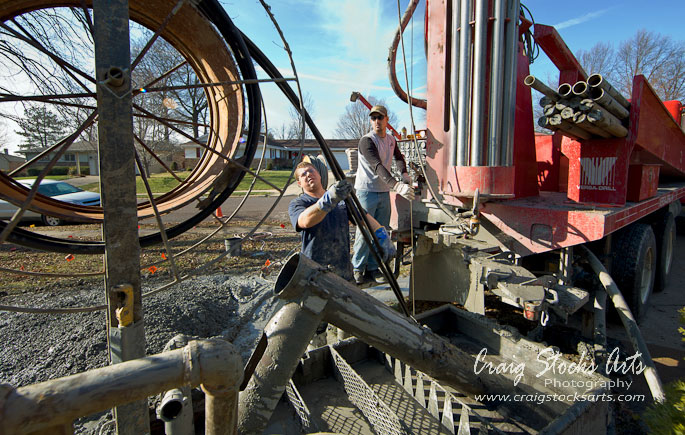
The second step in the process is to install the loop of pipe that actually does the energy transfer. The trick to getting a loop of 300 feet of plastic pipe into the hole is to attach a heavy pipe to the loop so that gravity pulls it down. As they slowly lower the weighted pipe, the loop simply follows it into the hole. Then, they use the cable hoist on the drilling rig to pull the weighted pipe back up.

Intalling geothermal loop

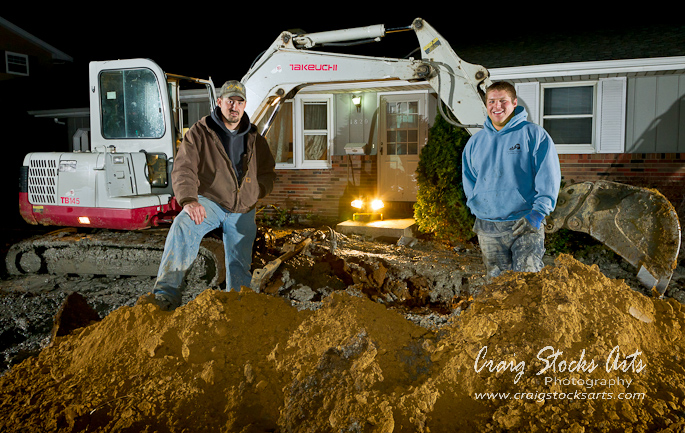
The last step is to connect the three ground loops and run the pipe into the house. They were trying to beat an approaching winter storm, so they worked into the evening to finish up. As you can see, the process makes a bit of a mess in the yard while they’re working, but most of the drill tailing will get buried with the pipe. After a little grading and some grass seed, the yard will look as good as new.

Geothermal heating installers

Posted in Recent Work | Comments Off on Installing Geothermal Heating and Cooling

How to Make a Sunny Day

I recently posted a new tutorial describing the techniques to making this architectural interior photo. Hint – it’s not really a sunny day.

Architectural interior of kitchen

Posted in Photography, Photography Techniques | 1 Comment

A Budding Young Artist

Metal flower in vaseOur grandsons spent the night with us the other day, and Caden, the eight year old, wanted to build a project in the shop. There’s nothing unusual about that, he always wants to build something. But, in this case, he wanted to make a birthday present for his mom. What I think is unusual for an eight year old is that he knew exactly what he wanted to make, and had a pretty good idea how to make it.

His idea was metal flowers in a vase. I had a simple flower pattern from several years ago, so I knew we were on pretty safe footing. As soon as we went to the shop, he started looking for materials. He quickly found a piece of 3/16 round rod that he said was perfect for the flower stem. Then he started looking for vase material and spotted some old brass handrail tubes in the rack. He wanted a base for the vase and found a disk of 1/4 plate that I use as a spacer.

Once the design decisions were made, we went to work. I still do the cutting and welding, but I don’t think it will be too long before he takes over. He has an imagination that never stops. He can always dream up something to create. What amazes me is that he can also describe how to make it. He may not know (yet) which tool to grab, or how to use a welder or a plasma cutter, but he certainly knows what pattern needs cut out, and which pieces need welded together.

Posted in Recent Work | 1 Comment

A New Tutorial about Shooting in Raw Mode

I recently posted a new tutorial and a companion video to describe some of the advantages of setting your camera to raw mode rather than its default JPEG mode. If you want more control over your images, more flexibility in how they’re processed, and better overall results, then shooting in raw mode is something you should consider.

[youtube _Gij6V05KoI nolink]

Posted in Digital Techniques, Photography Techniques | Comments Off on A New Tutorial about Shooting in Raw Mode

Are Your Photos Raw?

As I’ve mentioned before, one of the big advantages of digital photography is the ability to go back to old images and reprocess them with new software. Software keeps getting better and better each year, and there’s constantly new software coming along. Add to that your new skills and it’s almost like being to go back and retake the picture with a new, greatly improved film.

One caveat though, the ability to reprocess old images only holds true if your camera is set to shoot in raw mode. Most higher-end cameras can record the image in one of two ways, either raw, or jpeg. In raw mode, the cameras captures all of the data from the image sensor and records the raw data to the memory card. At that point, it’s not a picture, it’s just data. You then load the memory card data to your computer, and use special software to process the raw data into a finished image. In jpeg mode, the camera processes the sensor data into a finished image and then saves the image to the memory card.

Shooting in raw mode takes a little more work, but gives you a lot more flexibility. It’s a little like buying a cake mix versus buying a ready-baked cake. If I buy a cake mix, I can still modify the recipe, add goodies to the mix, and choose to make a round or square cake, or even cupcakes. If I buy a ready-baked cake, it’s pretty hard to add ingredients. If it came as a square cake, but I wanted a round cake, I’m pretty limited to the size of square I can cut out of the circle.

That’s the drawback to shooting in jpeg mode. All of the processing parameters are baked into the file by the camera. You can make some changes after the fact, but you’re pretty limited. And you certainly loose the ability to reprocess the image when better tools are available.

The finished photo below was taken in September 2006 in Jekyll Island, Georgia. The sun was still well below the horizon to the left, and the yellow glow is from sodium vapor lights in a motel parking lot. In fact, it was so dark that I couldn’t really see well to frame the image. The total exposure was at ISO 200, f2.8 for 30th seconds. The exposure time was long enough to pick up the stars, but short enough that they appear as points of light rather than short streaks. Needless to say, it was captured in raw mode.

Jekyll Island sunrise

Now, compare it to the original version shown below, before any adjustments have been applied. In particular, notice how much detail is actually in the nearly black areas in the foreground. That’s one of the areas where modern software for processing raw images really shines. If I had captured this image as a jpeg, those dark areas would have been recorded as pure black, and there’s no way to extract details and color out of a solid black area.

Jekyll Island original frame

If you want to learn more about using your camera in raw mode, feel free to get in touch with me. I offer very reasonably priced one-on-one training including camera settings and post processing. I also have a a number of tutorials on my web site, including a set of Powerpoint slides that I’ve used for training.

Posted in Digital Techniques, Photography | Comments Off on Are Your Photos Raw?