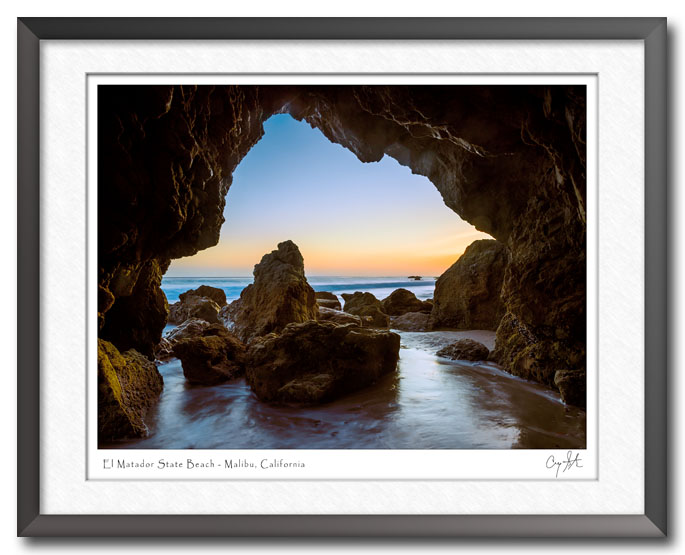
Sunset at El Matador State Beach near Malibu

El Matador State Beach is located about 10 miles up the coast from Malibu and is a wonderful spot to enjoy a sunset. This stretch of beach is rather small, but the rock formations and coves make it well worth the effort. There are several large formations with holes or tunnels at the base. For the photo below, the I’m shooting through an opening that’s about 4 or five feet high, so the camera is actually set pretty low.

El Matado State Beach

Posted in Photography, Recent Work | Comments Off on Sunset at El Matador State Beach near Malibu

Boys and Sand Dunes – What a Combination!

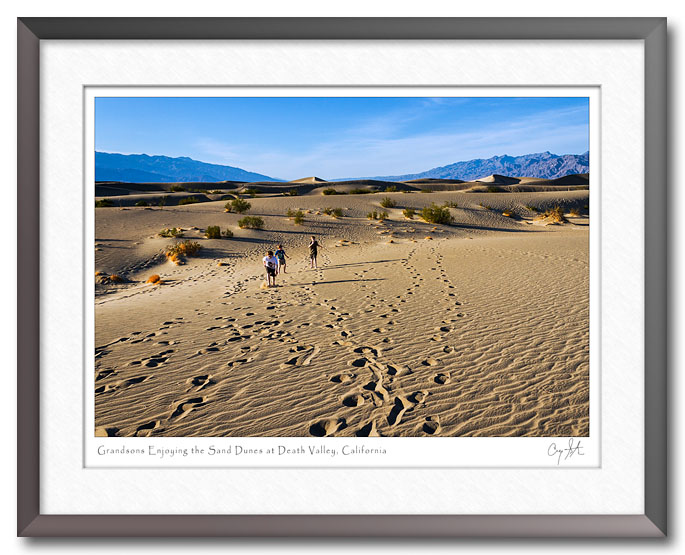
My daughter and her family finally made it to California for a visit and a vacation. I think everyone had a great time, although the first couple of days were affected by some apparent food poisoning they’d picked up somewhere in the San Francisco area. By the end of the week, everyone was feeling fine, and the boys were ready to romp in the sand dunes at Death Valley. They took off their shoes and ran barefoot, they jumped, they rolled, and they got covered with sand. By the time we left, even their pockets were full of sand.

Three boys running in the sand dunes at Death Valley

Posted in Family, Travel | Comments Off on Boys and Sand Dunes – What a Combination!

A Visit to the Valley of Fire State Park

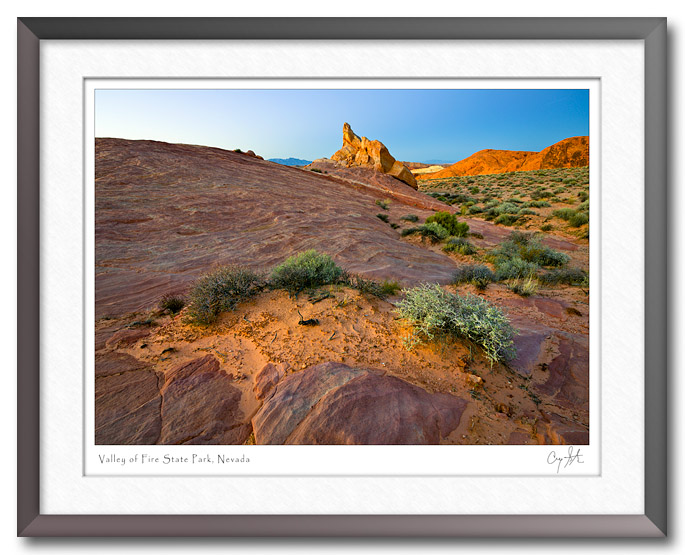
The Valley of Fire State Park is located about 40 miles north of Las Vegas and is Nevada’s oldest and largest state park. If you’re in the Las Vegas area and have some time for nature, I highly recommend the trip. The main attraction is the intense red color in the sandstone rock formations, but the park also has a number of large concentrations of petroglyphs.

Valley of Fire State Park

As usual, I went out for a sunset photo shoot. Unfortunately, there were two factors working against the photographers. First of all, there wasn’t a cloud to be found anywhere, so there weren’t any spectacular colors in the sky. The second problem was that most of the park closes at sunset, and the rangers were there to chase us out shortly after the sun went down.

I can certainly understand why parks feel the need to close at sunset – rangers want to go home to their families, and sunset is a very easy time to define. But for photographers, some of the best light actually comes after sunset (or before sunrise). In fact, my favorite time is during civil twilight, which is around a half hour before sunrise or after sunset.

The photo above was actually taken shortly after sunset, and just before I had to pack up and leave. There’s nothing going on in the sky, but the colors, shapes and patterns in the rocks provide plenty of interest. With or without clouds, sunset is still my favorite time of day for landscape photography. The quality of light and the colors can be spectacular.

Posted in Photography, Recent Work, Travel | Comments Off on A Visit to the Valley of Fire State Park

Big Sur – Again

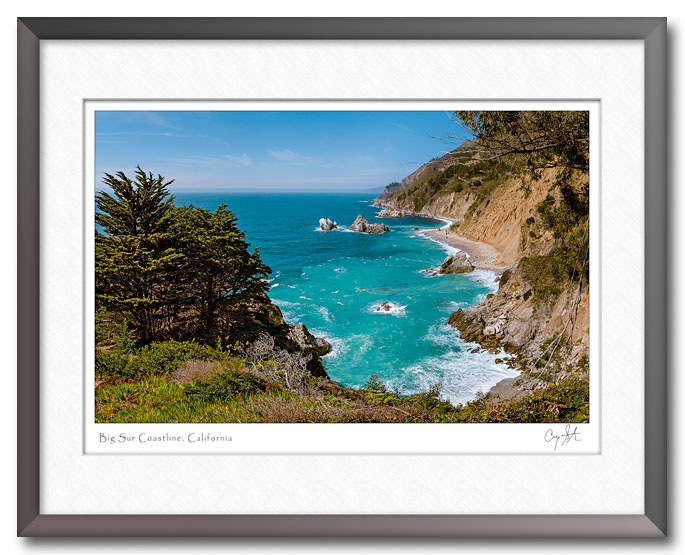
Big Sur is one of our favorite areas. It’s regularly voted one of the most beautiful drives in the world, and I certainly agree. Last weekend we made the drive from Monterey to Cambria, which covers the area “officially” considered Big Sur. The photo below is a stitched panorama taken from the overlook at McWay Falls. And yes, the water really was that color.

Big Sur

Posted in Recent Work, Travel | Comments Off on Big Sur – Again

A New Tutorial – Making a Bright Sky Look Right

Remember the TV show MASH? The show followed the antics of a group of surgeons from the 4077th Mobile Army Surgical Hospital in Korea in the 1950’s. Of course, it wasn’t filmed in Korea, it was filmed in sunny Southern California at 20th Century Fox’s Century Ranch. Today, the movie ranch is the Malibu Creek State Park, but the MASH filming site is one of the highlights. It a fairly easy 2.5 mile hike through some beautiful scenery to get to the site, and it’s well worth the effort.
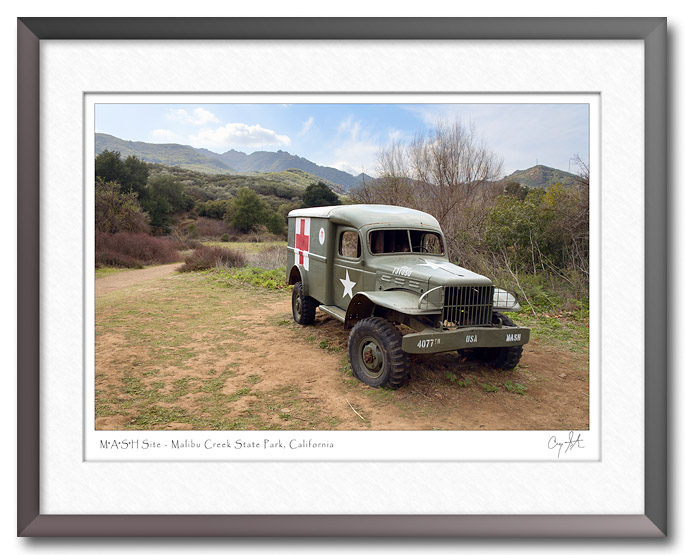
Jeep from MASH TV show

The scene pictured above presents the sort of challenge you frequently encounter. The sky is very bright compared to the foreground, and a camera can’t properly expose both the bright sky and the darker foreground all at once. One solution is to use a graduated neutral density filter, but in this case, I didn’t have one with me. When we’re hiking, I normally just carry a small camera and no accessories.

Another common approach is to take two exposures and blend them using Photoshop. Ideally you should lock the camera onto a tripod, set the lens to manual focus and the exposure mode to Aperture Priority and then carefully control the exposure compensation or turn on automatic exposure bracketing. But, for a simple scene like this, I’ve found I can take some shortcuts and still get good results.

Dark and light frames to blend

Most modern cameras use a half-press of the shutter button to lock the exposure, and the exposure calculation is based on what’s in the frame at the time. That allows you to frame a scene, half-press the shutter to set the exposure and then recompose the frame. In this case, I frame the scene to include mostly sky and half-press the shutter so that the camera calculates the exposure for the sky. Then, I recompose to get the scene I want in the frame and take the first frame (the dark one). Then I fully release the shutter button and take a second frame without moving the camera. The exposure for the second image is then calculated mostly for the foreground and that results in the lighter frame.

Then, it’s pretty straightforward to open the two images as layers in Photoshop, use the auto-align function to make sure they’re aligned and then use a layer mask to blend the two together. You do need to be careful that the sky doesn’t end up too dark. In this case, I ended up lightening the sky exposure frame a little bit to give a natural appearance. You still want bright regions to appear bright and dark areas to be dark for the photo to look right..

For more details about the process in Photoshop, check out my new Photoshop video tutorial.
Posted in Photography, Photography Techniques, Tutorials | Comments Off on A New Tutorial – Making a Bright Sky Look Right