Craig Stocks Arts Fine Art Photography and Artwork Duplication Services in Peoria and Central Illinois
January 26, 2010
If you follow photography you've probably heard about HDR. Hight Dynamic Range (HDR) photography is all about capturing the full range of light and dark that occurs in real life, but is beyond what a digital sensor (or film for that matter) can capture. Our eyes and brains are very good at compensating for drastic differences in bright and dark areas. Have you ever sat in a dark room and looked out a window into bright sunlight? Your eyes can see detail in the dark room, and details in the bright sunlight.
Unfortunately, cameras aren't nearly as adaptable. If you try to take a picture of that scene, you'll be limited by the camera's dynamic range, which is the total range of darkest to brightest values it can record. You basically have three choices, expose for the dark areas and let the bright areas turn completely white. Or, expose for the bright areas and let the dark areas become completely black. The third option is to try for the middle, but the bright areas will be too bright and the dark areas will be too dark.
High Dynamic Range photgraphy attempts to compress all of the tones so that they will reproduce as we see them. Whether the final output is to a computer monitor or a printed photograph, the picture can't display anything brighter than white, or darker than black.
The image below is an example of a situation where the range from the bright sun to the dark shadows was well beyond what could be captured or displayed. (Roll your mouse pointer over the image to see one of the original frames.) My eyes were able to see the entire scene, but it takes special techniques to reproduce all of the tones in a single photograph.
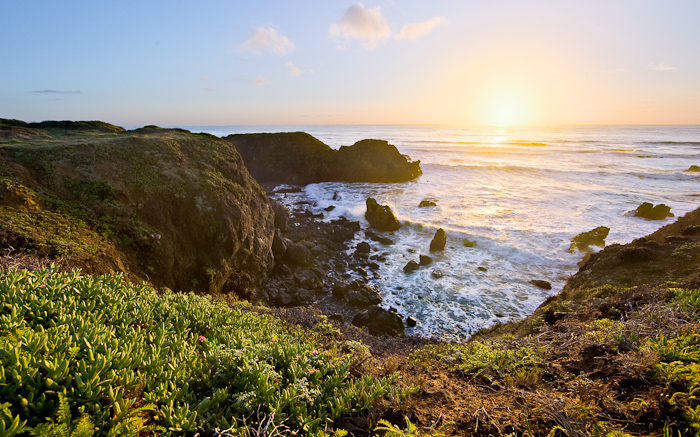
The biggest challenge with HDR processes is to compress the tones yet still have an image that looks natural. There are a number of approaches, but all of them involve capturing more than one image. Generally, you try to get at least one exposed for the brightest areas and one exposed for the darkest areas.
In this case, I actually used four layers. The base image was an exposure for the grassy areas and the rocks. A second layer was for the water, and a third was for the sky and sun. I then created a fourth layer just for the smooth transition from the bright center of the sun to the orange glow that surrounds it..
By carefully masking and combining the four layers in Photoshop, I was able to produce the final image. That's the view I saw from the cliff, but the camera just couldn't capture it all in one exposure. Thankfully, the modern techniques of the digital darkroom let us capture what we can see with our eyes so we're not limited to capturing just what a camera can see.