Taking the Picture
To get started, you need a suitable backdrop. There are a number of good options, including paper rolls, pop-up backdrops, and bulk material. You can also create your own by painting a wall or other suitable surface with an appropriate paint formulation. The best backrounds won't show any glare or reflections, so be sure to use something with a dull finish, such as felt or flat wall paint.

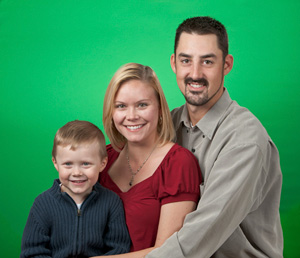
A good end result starts with a good mage. Make sure the background is brightly and evenly light. Ideally, you want a uniform, well saturated color that will be easy to select. It's important to avoid shadows on the background from the subject. In this example, there is a background light positioned behind the subjects specifically to light the backdrop.
You may run into a situation where the background isn't large enough to complely fill the frame. No problem, just make sure that the green screen is behind the most important parts, especially around hair or other difficult to extract parts. It's very easy to deal with corners and other areas of the frame with normal selection tools.
You'll probably want to avoid showing your subjects full length. It can be done, but there are numerous new challenges when the image includes the ground and a horizon line.
Be sure to keep some space between your subject and the background. If the background is too close, or too bright, you can get quite a bit of color contamination on the subject. In the sample photo, the backdrop was about six feet behind the subjects.
