Here's a photo from another session we did for potential sale as a stock photo. We set up several photos using Delavan's ambulance, a couple of EMTs and some family members as patients. Here, my father is "checked out" by EMT Chief Sean while EMT Kathy is using the radio. The ambulance was actually parked inside its garage at the time. There sure isn't much room inside the rig. To get this shot, I was hanging partly out the back doors.
When we were done, Sean approached me about setting up a web site for the Delavan Ambulance. It sure seems like a good idea, both as a way to help the EMTs stay informed and as a resource for recruiting. As a result, there is now a skeleton web site set up a www.delavanambulance.com. There isn't much there yet, but I'll start working on it soon.
June
I had a chance to go out to a job site with my son, Chris. He drills wells for geothermal heating and cooling - really cool work, but it's sure a dirty job. Chris and Danny (shown left to right below) have been working together for quite a while. Watching them work, it was obvious that they knew the job, and knew what each other would be doing each step of the way.
May
We had a nice trip to the Grand Canyon this past weekend. The weather started out great on Saturday, with lots of beautiful clouds decorating the sky. We loaded up the cameras and headed out along the trails, first a little ways down the Bright Angle trail into the canyon, and then along the Rim Trail that runs west from Grand Canyon Village. Unfortunately, the dark rain clouds moved in right behind the beautiful clouds, and we ended up in pouring rain, wind and even some hail. Once we were completely soaked, we made our way to a bus stop and got picked up by one of the shuttle buses. Sunday was better, mostly because we started earlier and left by early afternoon when the rain was starting again.
A trip to the Grand Canyon wouldn't be complete without a panorama to try to capture the whole scene. The small size here doesn't do it justice, so click on the image below to view a Zoomify version. When you zoom into the image, you can see the Colorado river in the middle of the canyon. Even though the river was a mile below us, it was so quiet that at times we could hear the rush of the rapids.
May
Deb and I made our last trip to the Organ Pipe Cactus National Monument where I've been serving as the Artist in Residence. This has been an extraordinary experience for both of us. We've gained a ton of knowledge about the desert and its plants. But we've also learned a great deal about how our national parks work.
We had hoped to catch a good selection of organ pipe cacti blooming, but it's still a little too early for most of them. However, the saguaro are in full bloom. Nearly every on had crowns of buds or flowers. The one below caught Deb's eye as we drove past. Three of its five arms were twisted down toward the ground. To get this photo, I used a wide angle lens and held the camera less than one foot off the ground.
Over the next couple of weeks, we'll be wrapping up here in Phoenix, and starting our move to Boston. We do plan to visit a few more Arizona icons, including the Grand Canyon, Canyon de Chelly and Monument Valley.
Most people haven't heard of Canyon de Chelly (pronounced canyon de shay). It's billed as Arizona's second largest canyon. The National Park Service maintains a visitor center and roadways along the rim. But, the interior of the canyon is controlled by the local Navajo people. You must be accompanied by a Navajo guide in order to tour the interior of the canyon.
I've also updated my Arizona web gallery with this and other photos from the day.
May
This newest web gallery has a selection of photos from lots of different places. They are more or less in chronological order. The first part is mostly shots from the Organ Pipe Cactus National Monument, where I served as the Artist in Residence this spring. There are also a few photos from around Phoenix, such as the one shown below. Other locations are Death Valley National Park, Mono Lake (in California) and Sedona. The latest photos are from Chiricahua National Monument in south-east Arizona. As you can see in the photos, it has amazing rock formations created by thousands of years of erosions.
May
This is another post about Photoshop, and the importance of post-capture processing. The photo below is from my trip to Death Valley and Mono Lake. This particular shot was taken right around sunset at Mono Lake. More specifically, it was 8:03 PM. The camera was on a tripod, and I used a 10 second time exposure.
Since it was so late, the light was very blue. Actually, the main light source was the blue sky, which gives everything a blue cast. Our eyes and brains automatically compensate for colored light sources, but cameras are much more limited. So, this is what the camera saw, but it's not what I saw.
The second version (shown below) is the result of basic color balancing and cropping. Specifically, I adjusted the color balance, saturation and contrast. What we see is that there are actually two light sources. The orange glow of the sunset is lighting up the left side of the tufas, while the blue sky is illuminating the rest of the scene. That gives a beautiful warm and cool light color contrast.
But, there still isn't any detailed retouching. If you look at the sky, you'll see little black spots caused by dust spots on the sensor. So, the next step is into Photoshop for detailed retouching.
The photo below is the finished product. The biggest change was to crop and rescale the photo. Compare the two, and you'll see that the foreground was enlarged, and the whole photo was expanded from top to bottom. I've fine-tuned some of the colors, but the most important changes are in the details.
The 10 second exposure rendered the water as smooth, even though it was windy and there were lots of waves. In Photoshop, I add a surface blur filter to smooth the water even more. I removed the dust spots, and also cleaned up the foreground by removing some small rocks and sticks that were distracting. I also removed a rock that was sticking up on the right hand side. Lastly, I enhanced the reflections of the tufas.
The point is that photography doesn't end when you take the picture, or when you download it to your computer. The finished result depends as much on photo processing as it does the image capture. It was just as true "in the old days" but most photographers depended on an outside lab to do their processing, so it was out of sight.
May
Today is Mother's Day, so it seems appropriate to recognize the mothers in my life. We all need mothers for obvious reasons, but their love and support is really what today is all about.
First of all, my own mother. And yes, I'll admit that she spoiled me. It could be because I was just so adorable that she couldn't resist. But I suspect the truth is that she just wanted the best she could provide for her children. She was always there to make sure we had swimming lessons, she took on Den Mother duties for Cub Scouts, drove me to the golf course every day during the summer for golf lessons, and the list goes on and on. As a child, I just never appreciated all that she was doing for me.
One of her influences is my desire to be creative. She designs and creates beautiful custom jewelry, and has even taught some classes at the local shop. Be sure to check her web site at www.maxessoriesbywini.com.
Thank you for being my mother.
I also want to recognize my wife and the mother of our children. Mothers and nurses seem have a lot in common, and Deb excels at both. She loves to support and nourish others. I think that's one of reasons she likes home health nursing - it's very personal. She seems to never tire of helping others, whether as a nurse, ambulance EMT, mother, grandmother, or wife.
The phrase is overused, but I wouldn't be here without her. She supported me when we were newlyweds so that I could advance my education, and she is supporting me now as we're dabbling in new pursuits. I'm extremely thankful that she's in my life.
Thank you for being my wife, and the mother of our children.
Our daughter, Cassie, is the mother of our three wonderful grandsons. It's really exciting to watch her devotion to her children. Between violin lessons, soccer, karate, Cub Scouts and camping, the boys keep her moving. I can't begin to count the number of times someone has commented about what a good mother she is. And, of course, the results are obvious in her children.
I also want to say a special thank you to Cassie for helping coordinate things on the home front while were out exploring the world. I know it takes a lot of time, and we will be forever grateful.
Thank you for being our daughter, and the mother of our grandchildren.
May
I couldn't resist doing another zoom panorama. Most of my panoramas are created by stitching several individual frames together in Photoshop. This one, however, is from a single frame cropped to a panorama aspect ratio. Use your mouse and the control bar at the bottom of the photo to move around and zoom into the photo to see details.
The photo is from Mono Lake in California. Mono Lake is just east of Yosemite National Park. It's a natural lake that has been used as a water source for Los Angeles since 1941. As the water level was drawn down, the tufas were revealed. Originally formed underwater, they are calcite formations similar to stalagmites. Conservation concerns are now limiting the amount of water drawn from the lake, so water levels are actually rising. Should the lake be restored back to its original depth, or should we keep the tufas visible? I'm sure there are lots of arguments in both directions.
I've now added a photo gallery with a few photos from my Death Valley trip. You can see it here.
Here's another photo from one of my favorite locations in Death Valley. This is an early morning shot from the Mesquite Flat Sand Dunes which is about 1.5 miles east of Stovepipe Wells Village. To really see the texture, you need to be there right at sunrise or sunset. And, you need to venture out into the dunes, which are about 1/2 mile from the road. Some of the dunes are pretty tall, so it pays to keep track of where you parked. I actually carried my GPS with me so that I could walk directly back to the car.
April
I made a quick trip to Death Valley this week, and even went up to Mono Lake one evening. I'll be posting a web gallery before too long. For now, I thought I'd share another panorama photo where you can zoom in to see the details. This one was taken at the Badwater Basin, the lowest point in the US at 282 feet below sea level. Fortunately, it wasn't too hot the day I was there.
Zoom in and look at the details in the structure of the salt.
April
Here's another photo from Sedona. This time, it's a panorama that was created using Photoshop to stitch together 13 separate images. Photoshop CS4 (the latest version) has greatly improved the stitching algorithms, but you still need to be careful when you shoot for a pano. The main things are to use manual exposure and manual focus to avoid inconstancies between frames. You also need to be careful how you pivot the camera since you can create some parallax problems if you swing the camera through an arc rather than pivoting the camera around the focusing nodal point.
One of the things I really like about panoramas is the level of detail, especially when you are using a 21 MP camera. The resulting files are huge! In this case, the full size image is about 120 megapixels. That's enough to easily make a print 8 feet wide! It seems almost a shame to to downsize it to post on the web.
To get a sense of the detail, use the Zoomify toolbar at the bottom of the image to zoom in to see the detail. There was a couple getting married on the Courthouse Butte overlook. What a place to get married! Image the vista they enjoyed as they stood there along the trail. Of course, the wedding party would also have been able to see the view of Castle Rock behind us, which I posted earlier.
To use the Zoomify features, click and drag the image to move. Use the zoom setting at the bottom to zoom in or out. The birdseye view at the top left shows which portion you're currently viewing.
April
Deb and I went up to Sedona for the weekend to see the sights and do some hiking. The photo below shows Castle Rock on Saturday about an hour before sunset. We were lucky that the clouds moved in late in the afternoon, since they were pretty much all gone by the time the sun went down.
The red rock was a real change after the tan rocks around Phoenix. I think it was an optical illusion, but all of the greenery looked very blue to our eyes, but the color in the pictures looks normal.
In this day of Photoshop and digital manipulation, people always seem to wonder if what they're seeing was real, or the result of Photoshop trickery. It's a legitimate question, and one that's frequently not easy to answer. All photos are manipulated, some more than others. Even in the "old days" of film, each type of film had unique characteristics for color, saturation and contrast. The method of processing, and standard printing processes such as burning and dodging also changed the appearance of the final image.
Digital opens up many more options. But, even if you never use Photoshop, the camera is doing quite a bit of image processing. The sensors in digital cameras record the scene in a very drab rendition. The engineers who designed the camera also included programs in the camera to adjust the color, contrast, saturation and brightness. Many cameras have multiple processing settings where you can choose what type of processing to apply. The point is, just because it's "straight from the camera" doesn't mean it hasn't been processed or tweaked.
Most advanced amateur and professional photographers choose to set their digital camera to simply save the raw sensor data rather than processing the image inside the camera. Then they use a program like Photoshop to tweak the image to their own taste. Normally, they do both global and localized adjustments.
The image below is the raw image of Castle Rock the way the camera captured it. There are obvious differences between it an the finished image above, but the most noticeable difference is the much brighter foreground. That's the result of applying selective, localized adjustments.
Everyone has their own standard of what's acceptable as photography, and where you cross the line into photo-illustration. For me, my goal is to produce the best finished image that I'm capable of, and I'm comfortable using all of the tools available to get there. I've always felt that the darkroom was an integral part of producing photography, and that's still true today with a digital darkroom.
April
We had a nice visit from our daughter's family last week. All three grandsons received their Junior Ranger badges at the Organ Pipe Cactus National Monument, and then got badges at the Grand Canyon a few days later. The photo below shows Colton and Caden with their workbooks on the visitor center nature trail. Their favorite part of the visit, though, was swimming in the pool at the apartment complex.
I've also been continuing to enjoy the trails around our apartment. Last night, I went up the trail again to get an evening photo of the cactus along the trail with downtown Phoenix in the background. The photo below shows two of the results. I really like the juxtaposition of the cactus with the city lights in the background. These were both 30 second time exposures. The light on the foreground was from a small flashlight.
March
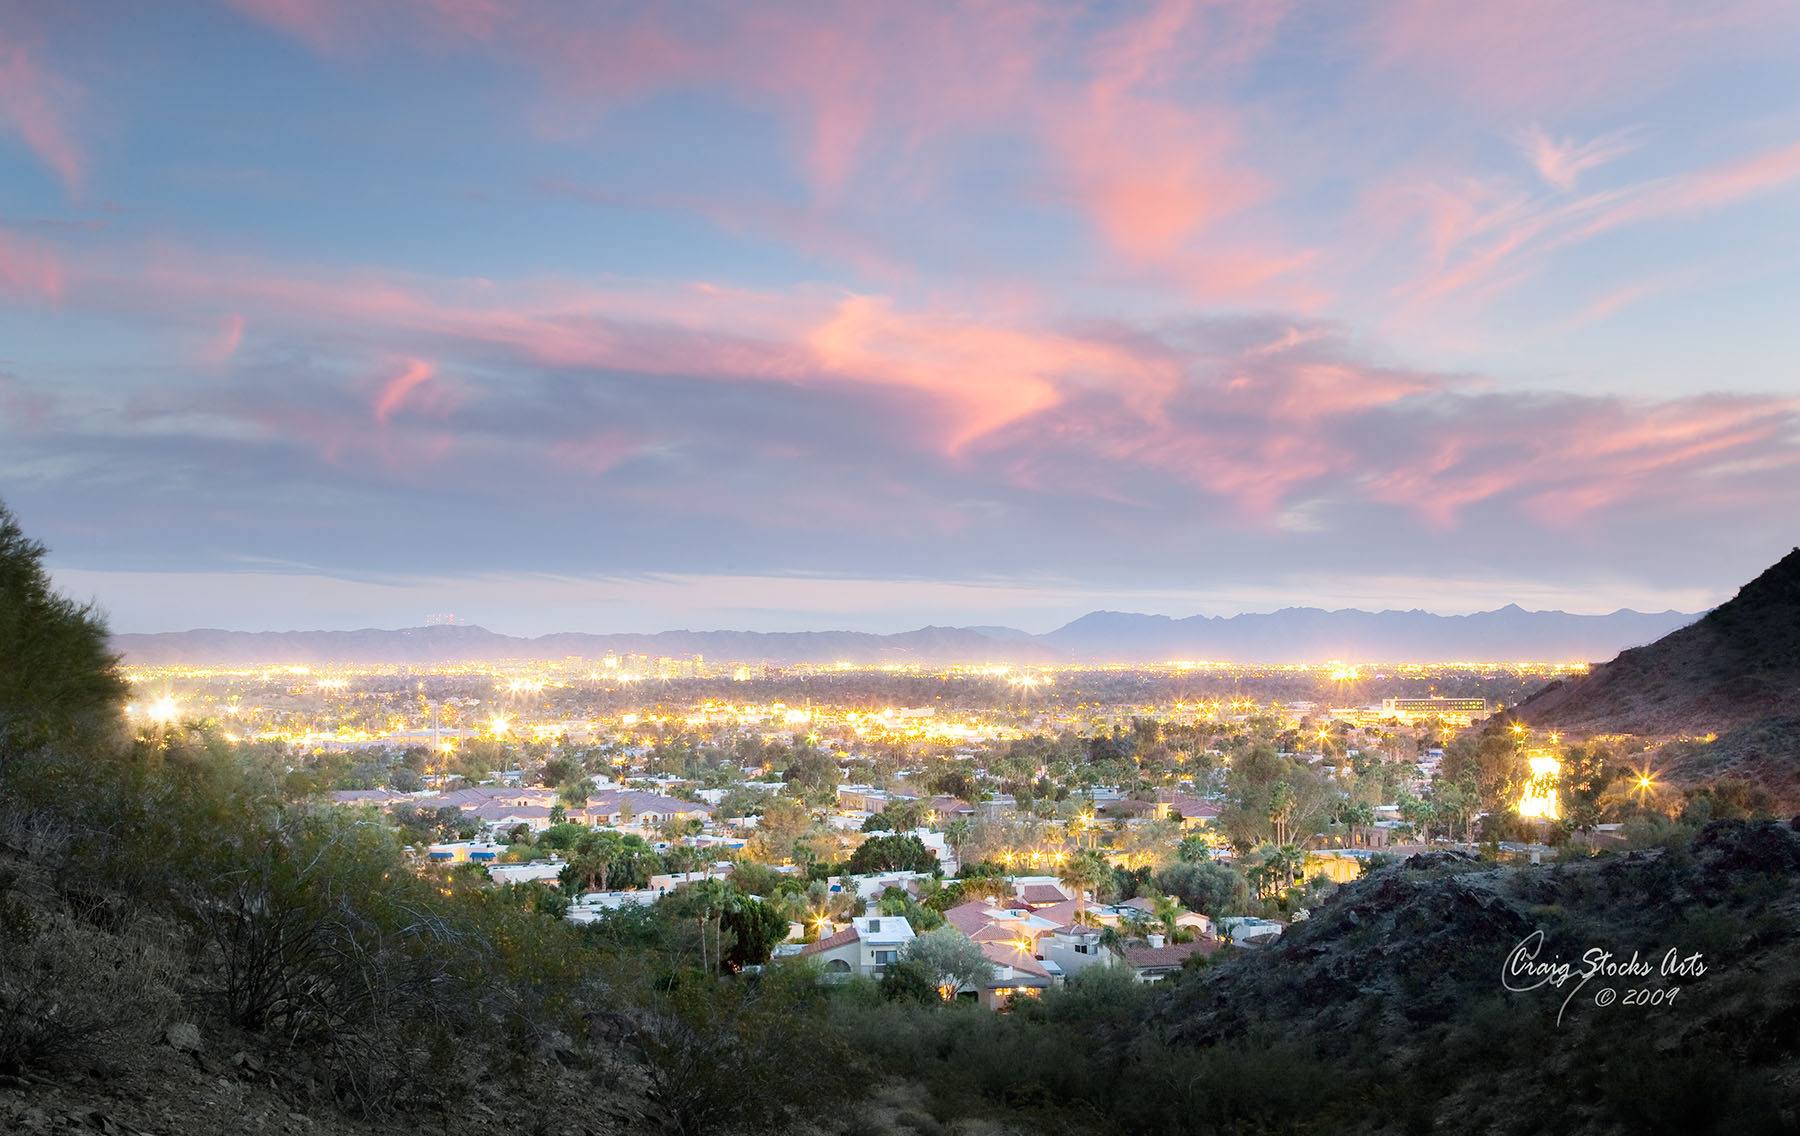
Deb and I hiked a new trail in the hills behind the apartment building. We found it gave a direct view of downtown Phoenix, nicely framed by the hills on either side. I just had to go back for a sunset photo. Click on the photo below for a larger version.
We also had a rare experience at the Organ Pipe Cactus National Monument. There is a natural spring which feeds a man-made pond along the very southern edge of the park. The area is closed to visitors due to concerns about illegal activity in the area. However, the resource management group had organized two days of work parties at the pond, and the interpretation group was able to tag along with visitor tours. The panoramic view below was taken from the north edge of the pond. Many thanks to park management, and Rangers Betty and Scott for the tour.
March
Our son, Christopher, came out to visit us for a few days. We spent a few days in the park, and Chris spent the time hiking and photographing the sights while I was tied up with other duties.. That's him in the above photo leaning over a cholla cactus to get a close-up of the blossoms. The panorama below was taken near the top of the Bull Pasture trail.
More pictures of flowers - this time Mexican Gold Poppies.
These poppies are blooming in lots of different places in the park right now, and they love to have their pictures taken. If you want to see more (and I'm sure you do) you should check out my new web gallery right here.
February
We went down to Tucson on Thursday to visit the Arizona Sonora Desert Museum. It's a wonderful museum, with exhibits ranging from caves to bobcats. They also have a Raptor Free Flight show twice a day, where the birds (hawks, owls and ravens) fly freely between the trainers - and right over the audience. I was able to get a number of good animal photos, so I set up a second web gallery just for that. The link is right here. The first photo in the gallery was taken at the Organ Pipe Cactus National Monument visitor center, there rest are from the Desert Museum.
The yellow flowers above were from our afternoon hike up the mountain. We're lucky to live right across the street from the North Mountain Park hiking trails. Unfortunately, the trails live up to their "mountain" park name. We're either getting in better shape, or just getting more determined, since we made it to the top of the mountain today.
February
If you read the Peoria Journal Star, you may have seen an article in the "Neighbors" section featuring a "Delavan Man.. ." Me. If you didn't see it, here's a link to the article. I was interviewed in early January, so it's taken a while for the story to make it into the paper.
Here's another photo from the park in Arizona. This little fellow (I believe it's a fellow) was hanging around the Visitor Center gorging himself on the nectar from the chuparosa plants.
February
Deb and I had a good weekend at the park. Besides going on a few hikes, it was a good opportunity to get to know more of the rangers and volunteers who keep the park going. The photo above shows a curve-billed thrasher (I believe) perched atop a cholla cactus. The photo was taken late in the day at the visitor center. The visitor center is the dark red block behind the saguaro cactus on the right side of the photo.
February
Well, the Arizona adventure continues. I've added a web gallery of photos from Organ Pipe Cactus National Monument. Actually, the last photo in the gallery is from the Phoenix Mountain Park hiking trail that's right across the street from our apartment.
The photo below is from the Arch Canyon trail. Even though it's the Sonoran Desert, it's amazing how green and lush it really is. During the next few weeks, the yellow Mexican Poppies and other wild flowers will be blooming, and some of the cacti will start blooming as well. Should be quite a sight!
February
We're beginning a whole new adventure this month. We're in Arizona where we're volunteering in the Organ Pipe Cactus National Monument. It's a large park along the border dedicated to (you guessed it) the organ pipe cactus. The organ pipe cactus is similar to the large saguaro cactus, but the branches all come from the base.
The photo below shows both an organ pipe cactus and a cholla cactus bathed in the warm evening light just before sunset. It's amazing how lush this desert environment really is.
January
I had a couple of fun sessions on Friday. We started the day with the Pekin High School Orchestra. After we finished with the group shot, the musicians wanted to do a less formal pose. The picture below shows what happened next. You can see the entire gallery here.
We finished the day with a sitting for three teenagers. They hung in there for nearly two hours while we tried lots of different poses. The one below is one of my favorites.
December
It seems that I'm getting more and more requests to do image restoration work, especially combining older photos to include deceased relatives into more current pictures. Sometimes the pictures are such that it's reasonbly easy to combine them, but frequently they're so different that it's nearly impossible to create a believable composite. There's also the challenge of striking a balance between too realistic and too ghostly.
Below is an example from a recent customer (used with their permission).
December
Since returning from Jekyll Island, I've been so busy with sittings that I haven't had time to "play" with my photos from the trip. But, during a recent break in the action, I started experimenting with self-publishing using Lulu.comIt's a very easy to use on-line service that you can use to publish anything from books to calendars. I've created a calendar from the photos from Jekyll Island. You can see it here.
December
I've now retired after 30 years at Caterpillar. Well, actially semi-retired since I'm doing more and more photography work.
To celebrate my retirement, my father and I took a golfing trip to Jekyll Isand for the first week of December. We had great weather. Since sunrise and suset are not good times to play golf, I took my camera to the beach for some photography fun as well. You can see some of the photos here.
The photo below is the sunrise on the morning we left to head home.
October
We had quite a trip the past weekend. We went to Burlington, Iowa for the weekend along with my parents, my sister and brother-in-law. Why? My folks lived there for five years, and that's where I was born. It was a time of family remembrances - where they lived, worked and played.
As it turns out, the hospital where I was born has been turned into an office building, but the old maternity ward is now a restaurant with a gorgeous view of the Mississippi River. We ate supper there, and were lucky enough to have a booth along the window.
The photo below was taken from our booth. I simply set the camera on the window ledge and used a long exposure.
September
Our three grandsons (Caden, Colton and Chase) were here for the day on Saturday. They love playing in the woods, and kept themselves busy for quite a while working on the fort, digging a fire pit, climbing trees, and generally having a good time.
By the end of the day, they were pretty muddy, and I couldn't resist a quick stop in the studio before they hit the showers. I think the pictures also capture their individual personalities.
A few weeks ago, I posted a photo of a nearby corn field just before sunrise. Well, Hurricane Ike rolled through the Midwest last weekend and dropped about as much rain in two days as I've ever seen in Illinois. And, since the corn field is along the Mackinaw River, portions were flooded.
The picture below was taken just after the river crested. The day before, the lowest points of the fence were complete submerged. The photo is actually a composite of six individual frames that were merged in Photoshop to create the wide angle view.
If you know Deb and I, then you know that Deb is a volunteer on the Delavan Ambulance squad. They recently put their new ambulance into service, and the chief wanted a good picture of the new rig. He had just spent several hours getting it spiffed up for the Delavan Fall Festival parade and fireworks, so it was a good time. This is the final result, after a fair amount of retouching in Photoshop.
Compare it to the original image shown below. They were leaving to take the ambulance to the fireworks show, so it was still pretty early in the evening. The light inside the cab is from a radio-controlled flash I placed on the center console.
Actually, turning a daytime photo into night works pretty well for a vehicle. Had it been dark, we wouldn't have had the reflections that allow you see the shape and details on the ambulance. If you examine magazine and advertising photos of cars, you'll see reflections of large white light sources- and it's those reflections that allow us to see the shiny object. In this case, the sky was my light source.
August
As I was making coffee a few days ago, I realized that we had all the right ingredients for a gorgeous sunrise. I grabbed the camera and tripod and headed off to a nearby corn field. I wasn't disappointed.
July
My wife's niece, her husband and their new baby Jacob.
July brings one of summer's high points - the 4th of July. We have a tradition of getting together with my parents' neighbor's family - kind of an extended family reunion. It was our turn to host the get-together the year and we had nearly 40 people at our house.
Of course, you have to have fireworks on the 4th. And, if you're a photographer, you have to take pictures of the fireworks. The one below is one of my favorites. You can see more here or from my Gallery page.
Fireworks are easy to photograph if you know the trick. Simply put the camera on a tripod and set the exposure to leave the shutter open for 10 to 30 seconds or so. The streams of light do all the work. (By the way, you use the same technique for lightning. Since fireworks tend to be very yellow, you'll get better colors if you use a tungsten white balance rather than daylight or auto.
I also added two off-camera strobes to give the photos a little more dimension. In this photo, one of the strobes is behind the group of people on the right, and the second strobe is behind the folks on the left. I also added tungsten CTO gels to the flashes to balance the color of the flash to the color of the fireworks.
I didn't do much post processing in Photoshop. I cropped and adjusted the brightness and white balance, but that was about it. The only exception is the first photo which is actually a composite of two images.
June
We've started to branch out into video demonstrations of photo techniques. This is our first effort. What do you think?
May 25
It's time for another of the series on my toys - both old and new. This is my first real camera, A Kodak Instamatic 104. It's the first one I got specifically because I wanted to be a photographer.
The Instamatic 100 was introduced in 1963 and was a huge hit for Kodak. The camera was small, tough and very portable. It also introduced the new 126 format film. The negative was about the same size as 35mm, but was in an easy-to-load cartridge. The film advanced by ratcheting a thumb lever instead of turning a knob, so you couldn't advance the film too much or too little..
In 1965, Kodak had just come out with the new 104 version. The big improvement was the flash cube - four little flash bulbs inside a plastic and foil cube that rotated to a fresh bulb each time you advanced the film. You could say it was the world's first point-and-shoot camera.
Sitting behind the Instamatic is my current uber-camera, the Canon 1Ds Mark III. Photography has made a lot of progress in the last 43 years. Of course, you can't really compare the 1965 entry-level consumer camera to a modern professional digital SLR. But, pretty much any current digital point-and-shoot camera will produce results dramatically better pictures than the Instamatics from 1965.
About the picture. The photo above was taken in my studio. Both cameras are sitting on a sheet of Plexiglas resting on a black table. The background is gray paper lit with strobe with a blue gel. The main light on the cameras is a small strobe shooting through a white umbrella. The rest of the lighting comes from white reflectors surrounding the cameras to create the reflections. The final image is a blend of two exposures, one focused on the Instamatic and one focused on the Canon.
May 18
I carry a photo of Deb in my wallet. Every time I get out money or a credit card, I have her picture front and center. Recently, it was time to update the picture, so we did a quick head and shoulders photo in the studio.
Everyone's portraits can benefit from some retouching - even beautiful people. The bright lights in the studio (even with soft lighting) generally aren't very flattering. And with modern, high resolution digital camera, you can see every line and pore.
After a little retouching, the character of the person is still visible. And hopefully, the photo doesn't look artificial.
Check out the before and after below by rolling your mouse over the picture below. It's the result of fairly basic portrait retouching. Her skin is softened, and her eyes look brighter. I also added some diffusion so that her hair and shirt weren't competing for attention.
May 12
This post is a little bit of a departure from the past few. 32 years ago, Debbie and I asked our good friend Jim Mathews to take our engagement picture in the Pekin Park. (The clothes and hair styles scream 1975, even if I didn't tell you.) At the time, I was a staff photographer at the Pekin Daily Times, and Jim was the Chief Photographer. Last year we got the idea to go look for the same tree, and create the "after" version.
About the pictures. The "before" picture was taken on 2 1/4 format film with available light only. It was an overcast day with a little light rain. The print we've had hanging on the wall has faded quite a bit over the years, so this was scanned from the original negative. (If I hadn't had the negative, I could have scanned the print and restored the color in Photoshop.) The "after" picture was taken late in the day. While the light in the trees came from the setting sun, we were in a shadow. The main light was an umbrella strobe high and camera left. There were also two strobes behind us left and right to create the rim light effect.
May 3
This picture has a lot going on. In 1964 when I was a Cub Scout, I won 1st place in the Pine Wood Derby. And that's my grandson Chase (also a Cub Scout) with my winning car. Actually, my Dad won first place, since I never could have built the car without him. We spent hours cutting and sanding. Then we took the car and some lead weights to the grocery store to check the weight. We found the combination of lead weights plus car that was just below the maximum weight, then melted the lead and poured it into holes in the bottom of the car.
My two younger grandsons, Caden and Colton, are looking on from the background. The red car is actually a race car (Legends of Racing series, 1937 Chevy) that I converted into a roadster for the boys to play with. The original race car was powered by an 1100 cc Yamaha motorcycle engine, and was capable of 140 MPH. The converted car is powered by an old golf cart engine, and can only make about 20 MPH.
About the picture. It was taken with an extreme wide angle lens which created the exaggerated perspective. I also stretched the perspective further in Photoshop. The photo was taken a little before dusk. There were a total of four strobes used. One camera left bounced in an umbrella, and one camera right facing the race car. Both of those were gelled with a CTO gel to make the foreground warm, and the background blue. There were two other strobes, to the back left and right of the race car, to create highlights. I also used a split neutral density filter to darken the sky a little more. Other than stretching the perspective, very little was done in Photoshop.
April 30
It's been quite a while since I've posted an update. I've got a number of new images in the series. The subject of the next one is cars. The two Corvette toys in the foreground are Matchbox type toy cars from the late 1960s or early 1970s. Each one is about 1 1/2 to 2 inches long. The Corvette in the background is my grown-up toy. Though it's not visible, the license plate is CES TOY1.
Once again, this picture required some work. The two toy cars are sitting on a piece of clear Plexiglas which creates the reflections. They're on a table about 100 feet from the real car. I used a 200 mm telephoto lens which tends to compress the distance between the objects. Since the picture was taken at dusk, I also used some strobes to light up the toy cars and the Corvette.
April 6, 2008
I received some feedback from my mother. She thought of a few other things that she was equally happy to see end. She mentioned something about smelly chemicals in the basement darkroom, and the time a friend and I used the bathtub to develop some color slides. I really don't know why the bathtub episode would have been a bother. We didn't finish until 2:00 AM since we kept running out of hot water, and I'm pretty sure everyone else should have been in bed by then. (By the way, my mother creates fantastic jewelry - visit her web site at www.maxessoriesbywini.com.)
I promised the next in the series. Sometime in the early 1960s I received a really cool telescope for a present. It was solidly built with two extensions, and had a tripod. The magnification isn't marked on it, but it's probably about 2X magnification. Quite a bit has changed in 40+ years!
A little bit about this picture. It was taken on our back deck, about 9:30 PM a few days ago. And yes, those are really the stars that were there. I did blend two separate exposures - one for the stars and one for the telescopes. I also did some work in Photoshop to make the stars stand out more clearly.
April 1, 2008
I've never been able to decide if I'm flexible, or indecisive. I think the difference is one is the ability to consider new information, while the latter is the tendency to reconsider old information.
Either way, here's a different view of my Saf-T-Saw. I can't decide which I like better. Any comments?
March 31, 2008
I've started a series of photos that I call Toys and Tools. The idea was inspired by my very first power tool that I recently discovered in my parents' attic. It was called a Saf-T-Saw, and it was designed to cut out styrofoam designs. For the photo series, I've tried to capture both the toy, and the modern tool. In this case, a rather substantial table saw.
I don't remember for sure when I got the Saf-T-Saw, but probably sometime around 1960. I can clearly remember tracing onto styrofoam sheets, and then cutting out the design. I also recall that the styrofoam sawdust made quite a mess, so I'm sure my folks were glad when all the styrofoam was used up.
Since I said this was the start of a series, you can safely assume that I have other old toys that would love to pose alongside the real thing. Check back soon for the second installment.